Showing posts with label Cricut™. Show all posts

Friday, December 9, 2011

Little Snowmen Cake Pops

Wait to see what I have for you today!

Look at this darn thing! I can’t believe I made it. When I first saw them on Bakerella, I didn’t even know how it was possible to make these. They looked so amazing, but complicated. Really, they’re not. It’s getting easier and better to make cake pops the more I make them, but I still have the cracking problem of the chocolate coating. That disappoints me. But still, I think they turned out AWESOME. As long as you have everything set up, it should go by in a breeze.

Snowmen Cake Pops
Ingredients:
-1 box cake mix (I used Duncan Hines French Vanilla Cake Mix)
-1 can frosting that coordinates with cake mix
-colored chocolate wafers (I got a pound of them but 1 and 1/2 pounds might be safer)
-1 bag sucker sticks
-1 bag Nestle Semi-Sweet Chocolate Mini Morsels
-1 tube of chocolate-coated sunflower seeds (I found them at Jo-Ann Fabrics in the checkout line)
-1 package regular oreos
-1 bag mini oreos
-Americolor Gourmet Writer Food Decorating pen
-styrofoam block
  1. You are going to follow most of the steps from the Pumpkin Cake Pops.
2. Slice all of the creme fillings out of your Oreos, and get them into a pile.

3. Form hats by melting some candy wafers, putting a dollop on the top of your Oreo, and sticking a mini one on top.

4. Mini hats! Too cute, right? I love these little things.

5. Once you dip your pops in your melted coating, press an Oreo hat on and push in an orange sunflower seed.

6. Let them dry in your styrofoam block.

When I did this step, there was a cake pop massacre. They all fell out of the styrofoam block from the weight of the hat and it was a fail. So what does that mean?
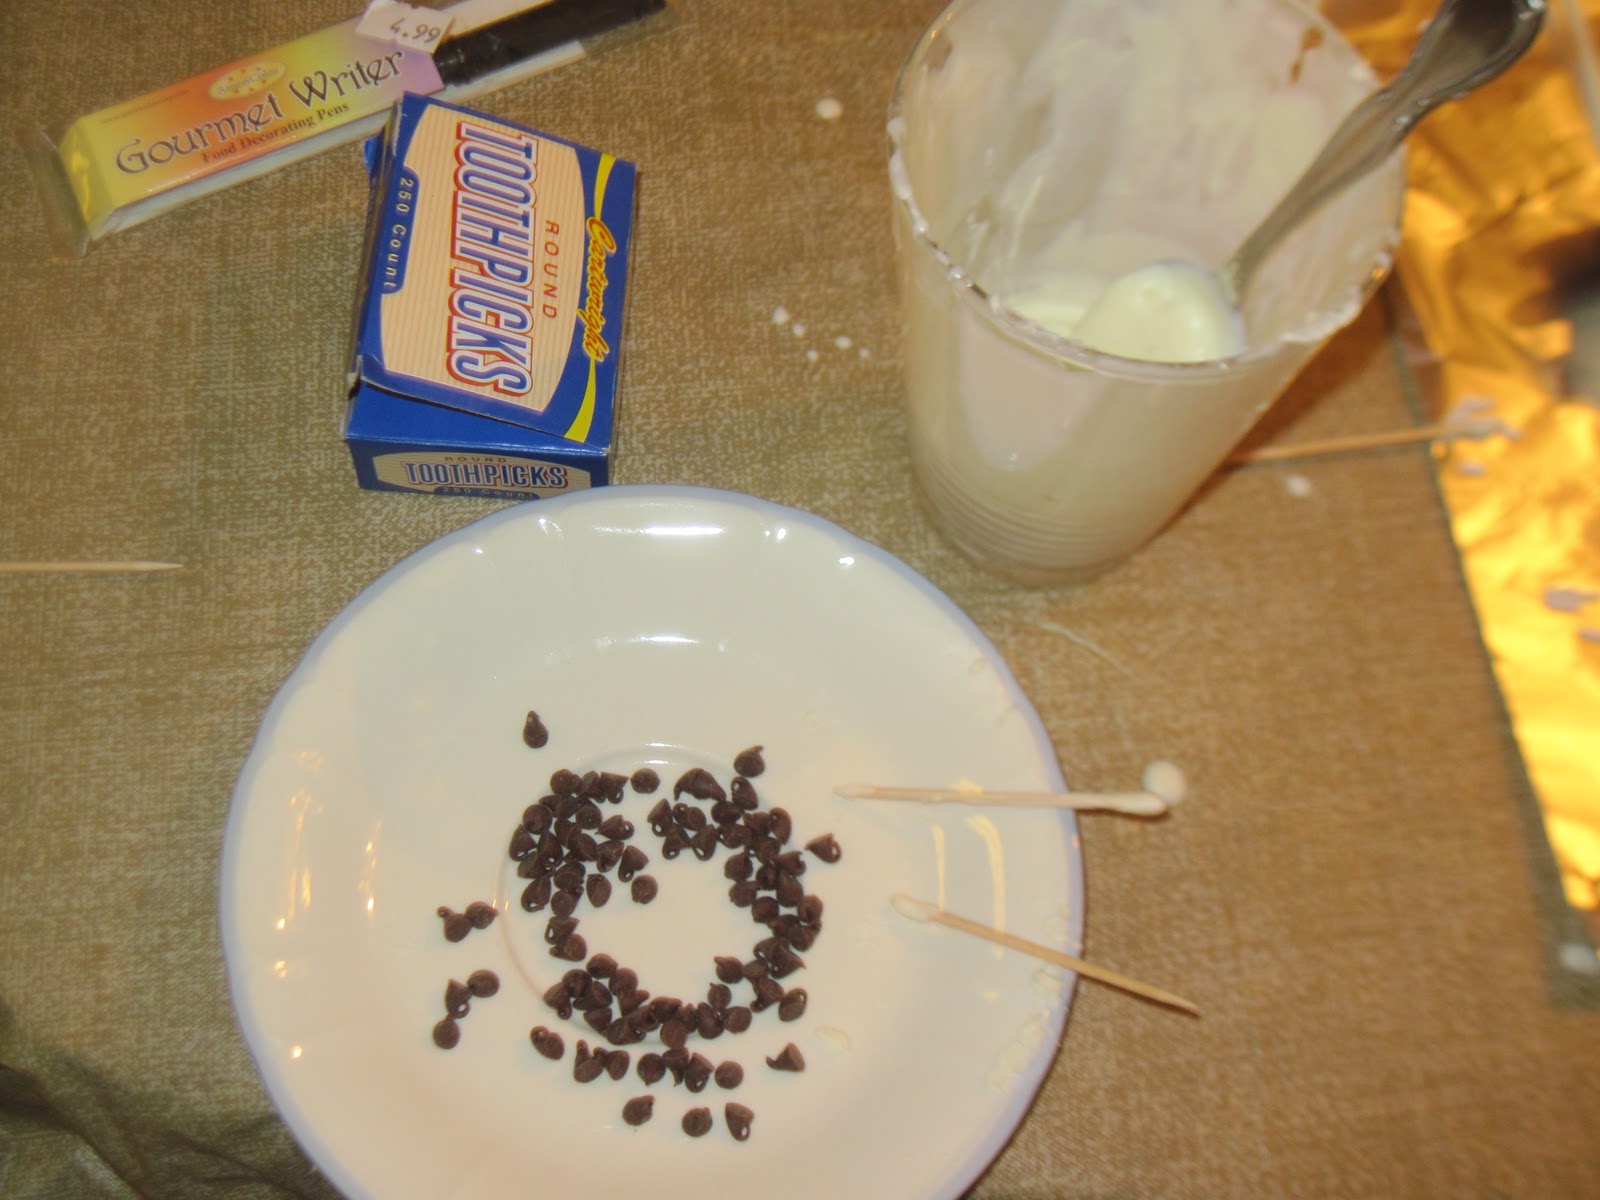
Cake pop surgery! Time to sterilize the chocolate glue and mini chocolate chips.

They are just coming to from the anesthesia.

7. Stick your cake pops in clear little bags and tie with a twist-tie.


8. I cut out little tags on my Cricut with some cute holiday paper and I stuck my Merry Christmas Labels on them.


9. Hole-punch all of your tags.

10. Cut out your holiday ribbon.

11. Weave it through.

12. Tie your ribbon around your cake pops.


And there you are!

Don’t cha love em’?

That’s a heck load of cake pops!

Enjoy the little fellas!


Happy baking!

Friday, October 14, 2011

Thanks A Latte Card

Five years ago (last February), I created this thank you card. And now I decide to share it with you. What’s wrong with me?
I thought this card was totally genius when I thought of the idea. Then I found out 5 million others did the same thing before me. Some great idea.
But isn’t it cute? Come see!


My first attempt was to print out multiple Caribou Coffee logos on brown card stock. I then continued my failure and tried to cut coffee mugs out of the same card stock. 
And with what, you say? With my Cricoto of course!
(P.S. This means Cricut in Spanish if you’d like to know:)
I eventually gave up with the idea of Caribou Coffee mugs and I added a little creativity. I found a mug on the Internet that served as my template for my own mug. Then I cut the mugs out using some hot pink card stock and patterned scrapbook paper. Sorry, I cannot give credit to what brand the paper is, due to the stacks have already been thrown out. However, I did get both papers in stacks from Jo-Ann Fabrics.
After those were all cut out and clean, I designed a little label on my computer, coordinating with the circle Avery labels I had at home.

Aren’t they gorgeously adorable?
I’m in love with designing labels. From these to the Dory/Just Keep Swimming ones, I’m on a roll. I really wish I could share a free template of these, but that’ll have to wait until I find out how to make these sharable. Hmm...

P.S. Midge is here again :)


Thursday, July 28, 2011

Getting to Know Sure Cuts A Lot 2: Using SVG Files

This is the final tutorial of how to use Sure Cuts A Lot 2. Yes, I know, there’s only 3. And they aren’t that fancy. Kinda crappy, actually (giggles). And I know there’s waaay better  ones on professional sites. So before I give my idea on how to use SVGCuts, lemme just give you a link to this baby right here, so you can actually have a real tutorial created by the persons who created the program.

Step 1: Go onto SVGCuts and find the file you want. Download it. I don't know what happens when you download it on a PC but when you do it on a MacBook it automatically downloads to where you want it.


Step 2: Go ahead and find the file you downloaded. In my case, I downloaded two, using Steve The Monkey and the balloon from the Graduation Cuddly Friends File.

Step 3: Now the files you downloaded should be on your virtual mat. Arrange the layers where you want and cut!

Happy crafting!

Thursday, July 21, 2011

Getting to Know Sure Cuts A Lot 2: Cutting With Your Cricut™

Don’t you hate when you really want to do something but you just can’t? That’s how it works with me and baking. Last night, at 11-something pm, I had an absolute need to bake. Maybe it was from drooling at pictures on Erica Sweet Tooth (You do not know how much I heart this site) or all those new ingredients I have in the pantry just waiting to be used (real vanilla, flour, soft brown sugar) and those extra ingredients that would be perfect for a recipe on that site (graham crackers, Hershey’s, and marshmallows). But I had a need. I really needed to bake something fresh out of the oven. And guess what? I didn’t. Why not? It was 11-something pm.
So now that we got over my random sob story, let’s get started!
Tuesday I revealed some very healthy tips on where things are and what you use them for. Today, I’m going to show you how to get a picture from the Internet perfected on your virtual mat so you can cut it.
Step 1: Go into the Internet or your personal picture library and pull out the image you want. Save it.


Step 2: Click the Add Image button and find your pic. Once you have, open it.

Step 3: This window will pop up. Don’t freak, it’s supposed to look deformed at this moment.


*Sorry about this, but Blogger was being stupid and it kept on switching Step 4 and 5 around*

Step 5: Your image should now be on your virtual mat. Get ready to play with it’s height and width until it looks semi-normal.
Step 4: Tinker your picture with Settings and preview after each change until it looks how you want it to. Click OK.


Step 6: Get rid of your Shapes Table and Font Table. That way you have a more clear view of your virtual mat.
Step 7: On your Properties, check Keep Proportions

Step 8: On your Properties, control Position & Size by changing the width and height of your object.
Step 9: On your Properties, control Position & Size by changing where your object is located.
Step 10: Cut your object with your Cricut™ connected to your computer.

Happy crafting!

Tuesday, July 19, 2011

Getting to Know Sure Cuts A Lot 2: Where and What

Your relationship with your cutting machine is an interesting one. It’s the relationship that brings you all those “oohs” and “ahhs” from those adorable crafts you create. It’s an important relationship to establish.
However, the relationship between you and your key to cutting anything you desire is far more important. Like my relationship with Sure Cuts A Lot 2 is fairly good. But I think it would like if I used it more. Yeah. That’s what would make it better. What makes it a good relationship?
#1 I know how to use it-
Knowing how to use your Sure Cuts A Lot 2 is an important step in establishing a good relationship. That way you can use it more!
#2 I like to use it-
Don’t get Sure Cuts A Lot if you don’t have a Cricut™ and you never will. Make sure you know what it’s for before you get it.
#3 I have time to use it-
Okay, I waste a lot of time doing stupid stuff, but I do have a good amount of time to play with my Cricut™ and its accessories (Sure Cuts A Lot). I have more time than I think. Don’t plan on getting either expensive things if you don’t have the time for it.
#4 Now that we got that cleared up, let’s get started!
This is what the Sure Cuts A Lot 2 window looks like when everything is opened up.


You’ve got your Font Table, Shapes Library, Properties bar, Tools bar, and everything in between. A lot of stuff that you don’t know what it is for. Well, let’s start with...
Where and What
I’m going to go over the basics of where everything is and what it is for. Don’t get bored along the way!


Hope this will help you for the time being! Over the next few days I will be posting; each  post helping you get around Sure Cuts A Lot 2 and developing your relationship (snicker, snicker) with it.
Have a good day!
P.S. If I began to sound a little hyper over the next few days, don’t worry. It’s only a little sugar rush I have from pigging out on Ben & Jerry’s® Milk & Cookies and Mint Chocolate Cookie :)

Tuesday, July 12, 2011

Summer Lotion Bucket

Okay, I know, I know this name isn’t very creative. But I couldn’t think of anything else. But hey, cut me some slack. Boy, am I excited for Pretty Little Liars tonight. It’s going to be intense. Who agrees? Yes, I know, off topic.
And today, and wanted to show you this.

I know, it’s an ugly picture, but I made this in late June, one Friday night, and I didn’t really care if my computer took ugly snapshots. I made it for a friend for her performance. Why lotion? That's a question we'll save for another day.
So I got one of the new deliciously-smelling lotions from Bath & Body Works for her. And I got some clear cellophane from Hobby Lobby and a adorable green bucket for a really cheap price. I just love this basket because it is so summery. Then I arranged the lotion and hot pink tissue paper I found at home in the bucket, wrapped it will cellophane, and tied it with some extra hot pink ribbon I had at home. Don’t you love it? I also attached a small flower I made with the basic shapes cartridge on my Cricut™ and wrote a little “good luck” note inside.
Happy crafting!


Saturday, February 12, 2011

Soccer Fox Card

I got a Cricut™ cutting machine for Christmas and at first I barely used it, because #1 I had no cartridges and #2 I had no time. Then I was introduced to this amazing software Sure Cuts A Lot™.  And then I found out about this amazing site SVGCuts . They have free files you can download for Sure Cuts A Lot™. And the two programs work together to create something even better than a Cricut™  cartridge. All you do is buy the program and you can cut anything for no extra money. How cool is that? 

So I have the Sure Cuts A Lot™ program and I use SVGCuts all the time. And wait till you see what adorable card I made today. It was quick, fun, and cute. A belated birthday card for my cousin who loves soccer. And what do you know, SVGCuts has a free file of a Soccer Fox. So I downloaded the file, and changed the colors a little. 


Instead of red brown for the head and tail, I used a light orange (I think this makes the fox look more girly). And Instead of the blue shirt I did a pink shirt and I added a pink bow. Also in this project, the eyes are a little too small, so I made two small ovals with a black permanent marker. 

After I cut all of my shapes out, I used my Xyron Create-A-Sticker Machine to stick it all together. This is one of my favorite products because all you do is slide your paper in, crank it through, rip off the access stuff, and peel your object off. Adhesive sticks to whatever is on there, and there's no messy, extra glue to deal with. This is a very friendly adhesive machine that everyone can use, including kids. 

After I glued everything together, I stuck it to a small piece of pink and white polka-dot KIWI™ Embroidery Paper and it was good to go! This only took me about 5 minutes, and I stuck it in a small pink envelope I found in my extra envelopes box. You can try this fun craft out if you have Sure Cuts A Lot™. Hope you enjoyed it!