Monday, December 26, 2011

Peppermint Patties

I created these a few days ago for a holiday party. If you love peppermint, or someone you know does, make these! The peppermint lovers I know said they were SO good. Hope you like em’! They will be perfect in raising the festivity at your Christmas parties or holiday parties. Sorry I didn’t post them a few days earlier :(


Peppermint Patties
adapted from University of Cookie
Ingredients:
-2/3 cup shortening
-2/3 cup room temp butter (I use salted)
-1 1/2 cups sugar
-2 eggs
-2 teaspoons vanilla
-2 teaspoons baking powder
-1 teaspoon salt
-3 1/3 cups AP flour
-1 bag of Hershey’s Candy Cane Kisses
Directions:
1. Preheat to 350°
2. Cream butter, shortening and sugar together until light and fluffy.
3. On medium speed combine the eggs and vanilla until mixed well.
4. Over low speed add baking powder, salt and flour and mix until it comes together.
5. Pour half the bag of Hershey’s kisses into a Ziploc bag and crush them until broken into small chunks. Repeat with the rest of the Hershey’s kisses. They do not have to look perfect
6. Mix the crushed kisses into your dough slowly, until well incorporated.
7. Take your scoop and plop balls of dough 2 inches apart on a parchment lined baking sheet.
8. Bake 8 - 10 minutes until edges are golden. 
9. When cookies are done let them cool on baking sheet for 2-3 minutes and remove to a wire cooling rack.
recipe adapted from University of Cookie

Peppermint Frosting
adapted from University of Cookie
Ingredients:
-1/2 cup shortening
-4 1/2 cups powdered sugar (I didn't sift *gasp*)
-1/4 cups + 2 Tbsp milk
-1 t. peppermint extract
Directions:
1. Cream your shortening and powdered sugar together until smooth, slowly add your milk and peppermint extract.
2. Mix until smooth.
3. Pipe or spread your frosting on top of your cookies (I piped mine, but the frosting got smushed from the tin foil).

Enjoy!

Thursday, December 22, 2011

Snowbars


These cuties came from this blog. I made them for a few friends yesterday and they all loved them. They are not hard at all and they make an awesome little treat for a casual friend, coworker, teacher, or neighbor.


Snowmen Candy Bars:
Supplies:
-Photo paper OR computer paper (regular paper) P.S. How much sheets depends on how many snowmen you are making
-Hershey’s bars OR any favorite candy bar
-1 pack baby socks (color of your choice)
-buttons
-black and orange permanent markers
-twine (mine was from The Twinery) OR ribbon
-double-stick tape OR other adhesive

Directions:
1.) Prepare your Hershey’s bars. Cut your photo paper into rectangles that are 6 × 6 1/2 inches.

2.) Center your bars in the middle of the rectangle, then fold one side over and tape it halfway on the bar and halfway on the photo paper.
3.) Fold other side over. Turn Hershey’s bar over.
4.) It’s time to begin the fun part! Take out your baby socks and cut off the toe part.


5.) Stretch this over the head of your snowman (the top of the Hershey’s bar).

6.) Draw on your eyes with a black Sharpie.

7.) Don’t forget the carrot nose and his mouth!

8.) Tie your hat with a bow made of twine or ribbon.


9.) Adhere two buttons with a glue gun, tape, or glue dots.


Look at these adorable little beanies!

Hope you can make some little snowbars yourself as a last minute present!

Bye, bye!


Friday, December 16, 2011

What's IN This Christmas Season

This Christmas and New Years’ Eve, it’s your turn to show off those sparkles and rock the red, green, and SILVER! Here are a few tips and ideas to make you stand out under the mistletoe.
Denim
This gorgeous denim polish pretties up any outfit this season. It goes with pretty much any pattern, florals or stripes, and you will steal all the attention.
Find: $9 Essie Bobbing for Baubles

Glitter
Glitter makes a perfect disco ball appearance to your fingertips and an even more perfect addition to your New Years’ Eve assemble.
Find: $14.99 OPI Muppets Collection Rainbow Connection

Fur Mittens
 Your fingers will be all toasty and warm and they’ll look cute at the same time!
Find: $19.50 Aerie Convertible Mittens from Aerie

Fair Isle Sweaters
Paired with pants, a skirt, or leggings, this holiday trend is too darn cute. They’ll provide you with plenty of cozy but cute outfits during the rest of winter.
Find: $70.80 Free People Cropped Fair Isle Pullover Sweater from Bloomingdale’s


Hope these quick ideas will keep you looking sleek and chic at your upcoming parties.
Bye, bye!


Monday, December 12, 2011

Homemade Peanut Butter Cups

You’ll need your ingredients:
1 cups creamy peanut butter
¼ cup unsalted butter
¼ cup light brown sugar
1¼ cups powdered sugar
4 cups milk chocolate chips (two 11.5-oz bags)
¼ cup vegetable shortening

Prepare your mini muffin tin and your pan. I used foil, not parchment paper, on my cookie sheet, only because I didn’t have any.

Melt your peanut butter, butter, and brown sugar over medium heat until melted and bubbling, just a little.


Add your powdered sugar ¼ cup at a time, stirring well after each addition.

Melt your chocolate chips with your shortening.

From there you fill your cups with a few teaspoons of chocolate. Refrigerate for 30 minutes, drop in your peanut butter patties, fill with more chocolate, and refrigerate again. These aren’t the exact steps, I’m sorry, but I found this recipe on Brown Eyed Baker so you can just head on over there.


I found this adorable little tin at Hobby Lobby for I think like a buck or two. I layered my peanut butter cups over each other.

I made this little tag by cutting a “3 1/2” circle out of holiday scrapbooking paper and printing out another tag on the computer.

I tied red twine from The Twinery around the tin with the tag I made.

The gift went to my mom’s friend’s son who is sick in the hospital. With all of his strength and positivity about everything he is taking it very well.

Cute, right?

Bye, bye!


Friday, December 9, 2011

Little Snowmen Cake Pops

Wait to see what I have for you today!

Look at this darn thing! I can’t believe I made it. When I first saw them on Bakerella, I didn’t even know how it was possible to make these. They looked so amazing, but complicated. Really, they’re not. It’s getting easier and better to make cake pops the more I make them, but I still have the cracking problem of the chocolate coating. That disappoints me. But still, I think they turned out AWESOME. As long as you have everything set up, it should go by in a breeze.

Snowmen Cake Pops
Ingredients:
-1 box cake mix (I used Duncan Hines French Vanilla Cake Mix)
-1 can frosting that coordinates with cake mix
-colored chocolate wafers (I got a pound of them but 1 and 1/2 pounds might be safer)
-1 bag sucker sticks
-1 bag Nestle Semi-Sweet Chocolate Mini Morsels
-1 tube of chocolate-coated sunflower seeds (I found them at Jo-Ann Fabrics in the checkout line)
-1 package regular oreos
-1 bag mini oreos
-Americolor Gourmet Writer Food Decorating pen
-styrofoam block
  1. You are going to follow most of the steps from the Pumpkin Cake Pops.
2. Slice all of the creme fillings out of your Oreos, and get them into a pile.

3. Form hats by melting some candy wafers, putting a dollop on the top of your Oreo, and sticking a mini one on top.

4. Mini hats! Too cute, right? I love these little things.

5. Once you dip your pops in your melted coating, press an Oreo hat on and push in an orange sunflower seed.

6. Let them dry in your styrofoam block.

When I did this step, there was a cake pop massacre. They all fell out of the styrofoam block from the weight of the hat and it was a fail. So what does that mean?

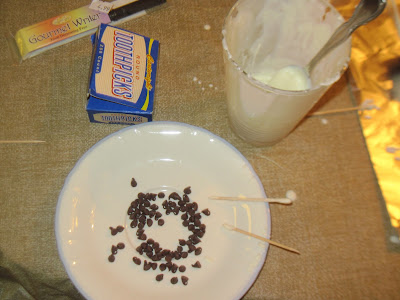
Cake pop surgery! Time to sterilize the chocolate glue and mini chocolate chips.

They are just coming to from the anesthesia.

7. Stick your cake pops in clear little bags and tie with a twist-tie.


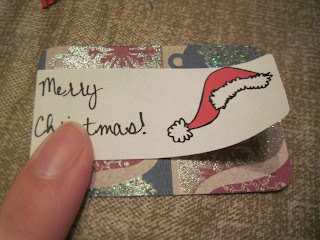
8. I cut out little tags on my Cricut with some cute holiday paper and I stuck my Merry Christmas Labels on them.


9. Hole-punch all of your tags.

10. Cut out your holiday ribbon.

11. Weave it through.

12. Tie your ribbon around your cake pops.


And there you are!

Don’t cha love em’?

That’s a heck load of cake pops!

Enjoy the little fellas!


Happy baking!