Sunday, July 10, 2011

Wet and Sticky is Very Icky, Sticky and Wet Makes Mommy Upset

Who knows what this quote is from? Come on, I know you know it. Alright, I guess you give up. It's from iCarly. That pre-teen show? Yeah. Why am I saying this quote, exactly? Who knows. See, that's kind of how people are. If we say something random and funny, everyone around us will burst out laughing, whether they know what we said or not, just because it was out-of-the-blue. And then a little while later they realize that it was not funny at all and they wonder why the heck they were laughing at it anyways.
Yeah, random, I know. That's how it works with me (giggles). Okay, so the reason I said that corny quote (tee-hee, isn't the word corny hilarious?) is because I have something sticky to share with you today.


Yes I created this picture with some Kevin and Amanda fonts, only because it's pretty cute, and I did not want to deal with copyright issues by stealing some other pic off the Internet
Mod Podge. Ever heard of it. Since I was an elementary student, I always thought it was pronounced like Modge Podge. I also thought it was spelled like that, but let's save my history of bad spelling and pronunciation for another day, shall we?
So anyways, Mod Podge. What is it? It looks like really thick glue that drys clear and shiny. And since I was determined to send a traveling journal (by the way thanks to my auntie for telling me about eighteen25. If you're reading this you know who you are!) to my sister while she is away—and I've been wanting to buy my own Mod Podge for a long time—I said what the hey and got a bottle plus a pack of 6 sponge brushes for only .99. Not including the sticky stuff, folks. Sorry. America's not that cheap.
And the story ends happily! I spread that Mod Podge over the cover of my already-made journal and smiled to myself. When I was done it was all glossy and shiny and the paper was sealed together. It turned out perfect.
I recommend you go out and get some Mod Podge if you haven't already. This stuff works like a charm and I've already got a few other projects in mind I'd like to use it for. I also suggest stopping by Hobby Lobby. This place may be a scrapaholic's dream. They've got rows and rows of everything you could ever need for crafting. And the prices are perfect. I shopped there one night to make my last-minute gift for my bestie's birthday party and I got a whole lot of crap for one small price.
I hope you enjoy! By the way, who’s as shocked as me about the Pretty Little Liars episode that premiered Tuesday?

Monday, July 4, 2011

Red, White, and Blue!

Wow. First and foremost, let me say it has been a long time. And by a long time, I mean about 2 months! Where have you guys been? I’ve been going to boats and water parks and swimming classes and baking in the sun. You know what’s weird? I’ve been frying in the sun. A lot. And I still haven’t got the perfect tan of a model, but... hey, I’m working on it. It’s impossible for me not to be stressed during these summer months. I mean I have to recover from all those hard days of studying in the school year. So, blog what??
But Happy 4th of July! And lucky you, you get a nail idea! My cousin perfected my toenails on Wednesday and even between swimming in chlorine and toppling over on my feet in yoga class, they still managed to look decent. And without the safety of a top coat!
I know, laugh all you want at my flip-flop tan line. 

Aren’t they *adorbs*? (*adorable, for those *normies* who don’t speak teen*) (*Lisi Harrison’s words, not mine. Sorry, I’m on a Monster High phase right now*) My nails, unfortunately, I cannot say the same about. That polish has been chipping off since Friday.
See, this is pretty simple stuff you see here. No fancy tools (we’re no artists), but some talent.
  1. Begin painting all of your toenails white except the second-to-last one. Or the one right next to your pig-toe.
  2. Paint the toe left blank navy blue.
  3. Once you have done these steps with both feet, begin painting 2-4 stripes on each toe with white nail polish, ignoring the navy blue toe.
  4. Wait till the big-toe has dried and paint a small square in the left corner of it with the same navy blue polish.
  5. Use a silver or white nail pen and apply small dots to the navy blue toe and to the blue square on your big toe.
  6. Make sure all of your toes are dry before you apply a top coat.
  7. DO NOT FAN OUT YOUR TOES OR PUT THEM UNDER A FAN. THIS WILL DULL THE SHINE AND USE OF YOUR TOP COAT.
  8. Enjoy the complements you will get on those nails!

Friday, April 22, 2011

My Green Post

Do you know what today is? Come on, don’t be afraid to guess. Well, if you are a clueless citizen (not to be offensive or anything), but it’s Earth Day! Yes, the beautiful day where we worship the land we stand on. Oh, and it's Good Friday to those who are *religious* like me (*Don't eat meat*) And we bend and kiss it and praise it (I was just kidding, don’t kiss the ground. That might be a little too friendly) Below is our wonderful Earth.


It’s so gorgeous I think I might cry (sob, sob... just kidding) But really. Mother Earth is unbelievably amazing. It’s so amazing I might fall flat on my face just thinking about it. But ignore the weird things I do. Just focus on the blue and green swirly colors in the picture above. I picked up trash all over a field and found some pretty... interesting things. I will not mention them, because it may be slightly disturbing, but ignore that too! This is what I want to know. How will you help the Earth today?
Don’t be worried if you don’t know, it’s one of those things we humans wonder about sometimes. Do something nice for the Earth. It can be anything. Even the smallest thing will make you feel a bit like you accomplished something.
Because I don’t want to copy—and I’m lazy—the following are links to some great pages:

 Have fun with these! P.S. Remember this chant: When you're trying to have fun, remember rule #1- Earth is our Mother. So let's try to save her! I know, it's lame. Ignore it. Bye!

Friday, April 15, 2011

8 Ways to Organize: Electronic Wise

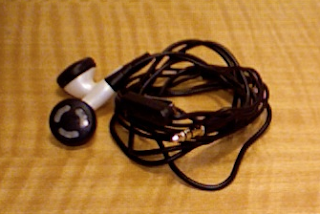
Electronics are all a necessity to us, right? I mean we communicate, share news, learn things, and so much more! But then there’s the cords, and the plugs, and the disks, and the headphones—all that electronic-savvy mumbo jumbo that we don’t need to get into. And on the bright side—all that mumbo jumbo gets tangled up and ruined! No, I was just kidding. That doesn’t always happen. I’m serious, chill. But you know what I mean. Taking care of electronics can be hard, but it can be easy too! Now here’s the fun part:

I’ve got 8 Ways to Organize, right here. So sit back, relax, and have your electronics close to you, cause you may want to start organizing while your reading this! JK-ing again.
8 Ways to Organize: Electronic Wise (Hey, it rhymes!)
Wrap your cords so they don’t get tangled And the best way to do this? Ta-da! Yes, it’s magnificent, it’s creative, it’s the most original idea on Earth—zip ties! You never would have guessed, right? Or some fancy schmancy things I like to call... twist ties! They’re extremely expensive and very hard to find though. Just kidding again! Wow, what’s wrong with me today? All these lame jokes are probably really getting to you. But zip or twist ties are both cheap and easy to find. You can usually find them any place. But if you wanna get real scientific, look at an office store.

Make a special container to keep your earbuds Well, what do you know? I have an easy-peasy-lemon-squeezy craft idea exactly for that right here! Having a small place that you recognize is for that item, really helps you remember to put it back and KEEPS THEM UNTANGLED! How great is that?
Fold your cords of certain electronics Do you know the right way to fold your electronic cords together? Well, do you? Well if you don’t (let’s pretend that you don’t), put the two ends together, and keep folding together. Yep, it’s that easy. Don’t sweat it, you’ve still got 5 more tips to go! (squeal!)


Get a case Yes. I know this not the most original idea out there, but it helps. There are cases for everything! Laptops, iPods, iPads, handheld game devices, phones—you get the idea. And guess what? There is even cases for your electronic accessories. Cases to keep your cords and plugs, cases for your headphones—I could go on and on but you get the picture. And... you wanna know the next cool thing? There is even cases to keep your cases in? Wow, aren’t we creative. But, the point is, cases keep your items concealed and protected. Oh, and did I mention adorable?
Put certain things together This may be a little confusing, so let me explain. I mean if you have certain items and their accessories, put them all in one container. Yep, that’s right, you’re not hallucinating. I mean go out and buy some of those drawer dividers and arrange them in your desk drawer. Make sure only electronic-related items get put in there. Keep a designed divided area for each different item—for example: iPod related stuff; supplies for cleaning electronics; all of your headphones; batteries; chargers—and keep those items in their places. Then you’ll get used to reaching there when you’re looking for something and putting it back when your done.  
Get rid of those cases, get modern! You know how DVDs get lost or scratched because sometimes their cases are being used for something else or were misplaced? Well, try this. Recycle all those trashy cases and buy a DVD album. That’s right! There are some pretty cute ones out there too. Keep all your DVDs in there. Or, if you’re the tech-savvy-kind, load all of your movies and CDs onto a computer and don’t deal with any mess. This is easy and a good way to get rid of unwanted clutter.


Put everything together! Want to forget the cases, forget the dividers, and forget having separate places for everything? Then this is your dream come true! Get one of those large storage boxes from any store and throw all of your junk in it! That’s it! Just be warned that you’ll have to fish out your items any time you’re looking for them!
Charge it up Sorry, I stole this one from a little birdie. Shh... Okay, your family is all charging their devices in different areas, which is a recipe for disaster. If everyone had some idea where they last saw the device, there would be no problem, right? So get a charging station or dock. This will be so much simpler for the family, and, you could station it at the home computer which we all use on a daily basis. 

Sunday, April 10, 2011

Baking, Anyone?

Well, it just so happens I finally finished my to-do list. I've worked out a lot this week (Yay! This was at the top of the list), I made cupcakes (Known as the best cupcakes they've ever tasted to the people who've tried them), and I've gained a lot of money to donate to this hospital I've started to help (Thanks to all who've helped me!)

I've decided I want to try a new recipe at least once a month (I was going for once a week, but you know how Americans are soo busy busy!)

So, this week, I made cupcakes for my sister. They turned out perfect, until I wrapped foil around them right after they got out of the oven. I went to the mall, and when I came back, they were ruined! Sob... sob... I was just kidding, they weren't completely ruined! The tops got a little soggy, so I shook a little powdered sugar on them and continued the recipe. And after I piped the frosting on, I have to say, they were... AMAZING!!!

The cupcakes were Chocolate Chip Cookie Dough Cupcakes from KevinandAmanda. I may have mentioned this website once. Or twice. Or thrice. Just kidding. That's not a word. But excuse my bad jokes, but may I describe these? They were so tasty and soo good! The frosting was absolutely my favorite part. However, I did not lick the frosting off first. I'm not that kind-of-girl. I like to eat the whole cupcake together. Don't worry, the cookie dough doesn't have raw eggs in it so the cautious people can calm down. Now. Be prepared. When you make these cupcakes, and you share them with others, you will get a lot of complements. But I told them all to give credit to Amanda. All I heard this weekend was "These are the best cupcakes I've ever tasted." I'm serious. I'm not joking. Really. Everyone told me that. Today I'm so bored from hearing that this weekend. My relatives came over today and they finished the rest of them off.

But believe me, I will definitely be making more soon :) But besides the cupcakes, look what I've decided to do for Easter Brunch? Everyone probably knows about these already, but in case you haven't, why don't I tell you? This site, Bakerella, introduced us all to cake pops. Yes, cake balls on lollipop sticks. How cool is that? And don't let me forget to remind you they're adorable too! So cute!! I'm making the baby chicken pops, and a lot of my cousins are still little, so these will be perfect! I am honestly jumping for joy here. I am soo excited to start them! And if they work good at this party, I plan on making them for every party! There is so much variations of them and they are such a creative idea. There's even a book you can buy.

So yep, that's my update about what I'll be making in the next week or so. Happy Early Easter everyone! I hope the Easter Bunny fills your baskets with all your favorite goodies! LOL :)

Monday, February 21, 2011

Homemade Gift Boxes


I had no time to show these darling gift boxes to you during the Christmas season. Yes, that's why they are made with holiday scrapbooking paper. 

These boxes are the most simple and adorable things I've ever created. I made about 5 of them for this Christmas and everyone loved them. 

Okay, so let's get started. You need a sheet of 8 1/2"× 11" piece of scrapbooking paper or colored cardstock, whichever you prefer. I used Christmas scrapbooking paper for my boxes. 

On the longer side of your paper, score at 2", 5", 7", and 10". On the shorter side, score at 2" and 7". Now, the next part is tricky to explain so I made a diagram to show you. 


Okay, this isn't the exact size it would be if you actually made the craft. Obviously I can't make it but these lines are similar to the ones you will see when you score them. 


After you score, first cut lines A, B, and C, up to the two horizontal lines on the other side of the paper. Tape them together with a strong adhesive. At the bottom half, where D, E, F, and G are, press them together. 


Make two holes with a hole punch at the top and slide some matching ribbon through them. Put in some tissue paper and your gift and tie the ribbon into a beautiful bow. You're good to go!


Saturday, February 12, 2011

Soccer Fox Card

I got a Cricut™ cutting machine for Christmas and at first I barely used it, because #1 I had no cartridges and #2 I had no time. Then I was introduced to this amazing software Sure Cuts A Lot™.  And then I found out about this amazing site SVGCuts . They have free files you can download for Sure Cuts A Lot™. And the two programs work together to create something even better than a Cricut™  cartridge. All you do is buy the program and you can cut anything for no extra money. How cool is that? 

So I have the Sure Cuts A Lot™ program and I use SVGCuts all the time. And wait till you see what adorable card I made today. It was quick, fun, and cute. A belated birthday card for my cousin who loves soccer. And what do you know, SVGCuts has a free file of a Soccer Fox. So I downloaded the file, and changed the colors a little. 


Instead of red brown for the head and tail, I used a light orange (I think this makes the fox look more girly). And Instead of the blue shirt I did a pink shirt and I added a pink bow. Also in this project, the eyes are a little too small, so I made two small ovals with a black permanent marker. 

After I cut all of my shapes out, I used my Xyron Create-A-Sticker Machine to stick it all together. This is one of my favorite products because all you do is slide your paper in, crank it through, rip off the access stuff, and peel your object off. Adhesive sticks to whatever is on there, and there's no messy, extra glue to deal with. This is a very friendly adhesive machine that everyone can use, including kids. 

After I glued everything together, I stuck it to a small piece of pink and white polka-dot KIWI™ Embroidery Paper and it was good to go! This only took me about 5 minutes, and I stuck it in a small pink envelope I found in my extra envelopes box. You can try this fun craft out if you have Sure Cuts A Lot™. Hope you enjoyed it!